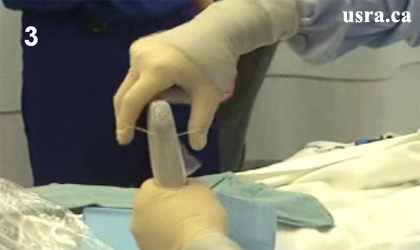
Preparing the Transducer for Single Shot
 |
 |
 |
 |

Advancing the Science of Ultrasound Guided Regional Anesthesia and Pain Medicine
Preparing A Sterile Transducer

For catheter insertion, it is important to place both the transducer and its cord inside a sterile sheath to guarantee complete sterility.
Cord protection is important because the cord is often laid on top of the sterile procedure field.
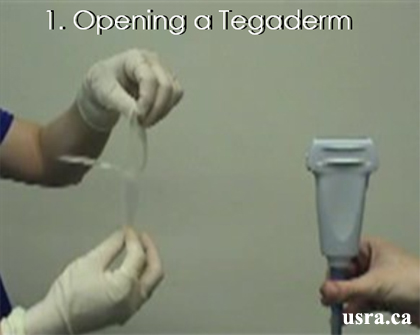
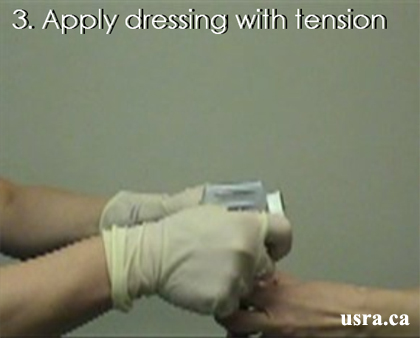
Alternatively it is practical and economical to use an adhesive transparent dressing (e.g., TegadermTM 3M) to cover the transducer
surface for a single shot block. Because the dressing is adhesive, it is not necessary to place gel between the transducer surface and the dressing.
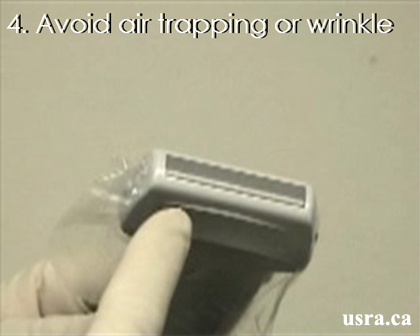
Avoid air trapping or wrinkle on the contact surface. The transparent dressing is also helpful in protecting the transducer surface against staining by marking pen, prep solution or blood.
Preparing the Transducer for Single Shot
|
|
|
|
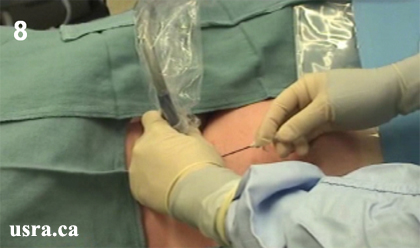
Preparing the Transducer for Catheter Insertion
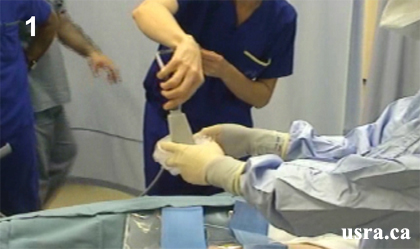 1. Place the transducer inside a sterile sheath.
|
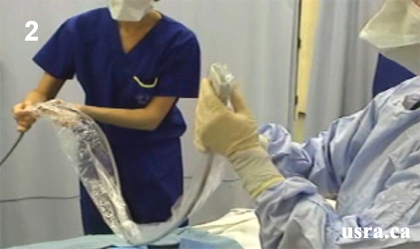 2. Cover the transducer and cord completely inside the sterile sheath.
|
 3. Hold the sheath in place with a rubber band around the transducer head.
|
 4. Place the transducer over the sterile procedure field.
|
 5. Use a package of sterile acoustic gel.
|
 6. Apply sufficient amount of sterile gel over the site of scanning.
|
 7. Place the transducer over the procedure site.
|
 8. Insert a needle under ultrasound guidance.
|
Transducer Movement
Practical Recommendations
It is best to gently rest the arm holding the transducer on the patient's body or bed to maintain hand steadiness and avoid fatigue during scanning.
There are three Basic Transducer Movements (mnemonic = "ART")
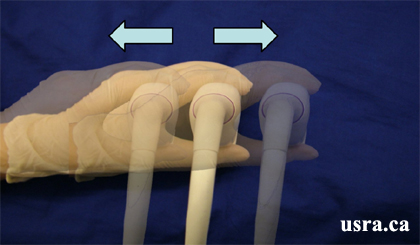 1) "A" = Alignment; sliding the transducer longitudinally |
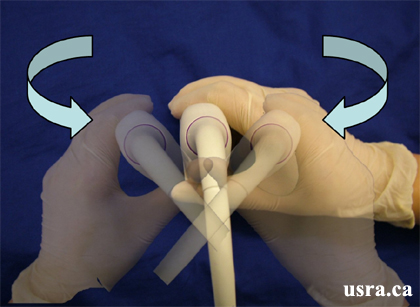 2) "R" = Rotation; rotating the transducer (clockwise / counter-clockwise) |
 3) "T" = Tilting; tilting or angling the transducer |
Alignment [Link to top]
Alignment refers to the task of sliding the transducer longitudinally to follow the course of the target e.g., a nerve. or a needle.
This first transducer movement is also most useful in locating the block needle.
1. Tracing the Needle Shaft and Tip by Sliding the Transducer Longitudinally
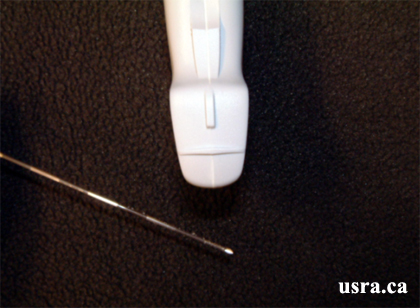 |
When the transducer (ultrasound beam) and the needle are perpendicular to each other (out of plane approach), it is important to slide the transducer along the shaft of the needle (alignment) to identify the needle tip. Both the needle tip and shaft in cross section appear as a hyperechoic white dot on the screen. |
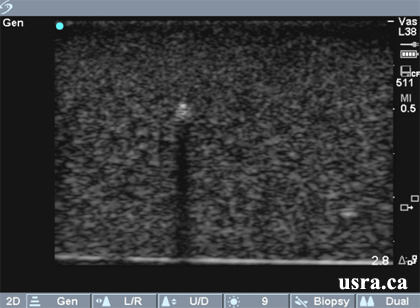 |
Warning: This image may not represent the needle tip. Locating the needle tip can be technically challenging (Needle Tip Localization). |
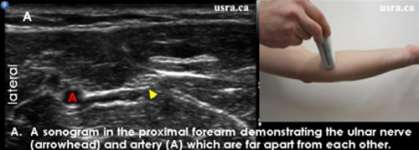
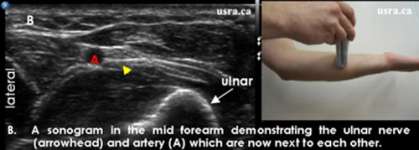
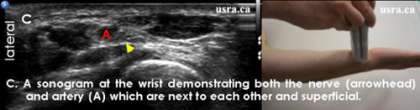
2. Tracing the Course of the Ulnar Nerve by Sliding the Transducer Longitudinally
Rotation [Link to top]
1. Transducer and Needle Alignment
Rotating the transducer is most useful for aligning the ultrasound beam with the needle (in plane approach) so that the entire length of the needle (both shaft and tip) can be clearly seen.
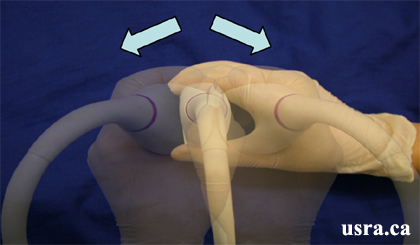
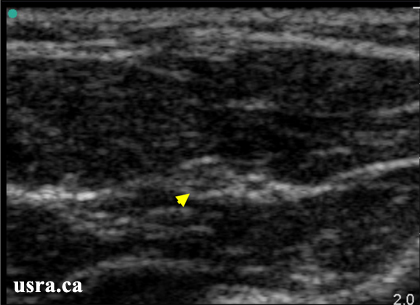
Needle and Transducer in Partial Alignment

 Here the needle shaft (arrow) is partially seen while the needle tip is not.
Warning: Do not mistake the needle shaft for the needle tip. Counter clockwise transducer rotation will bring the needle and transducer into proper alignment.
Needle and Transducer in Proper Alignment

 Note: The needle tip is now visualized (arrow).
2. Transducer, Needle and Nerve Alignment
Rotating the transducer is also required to accurately align the transducer (ultrasound beam), the needle and the nerve all in one plane. This allows visualization of both the nerve and needle in the long axis.
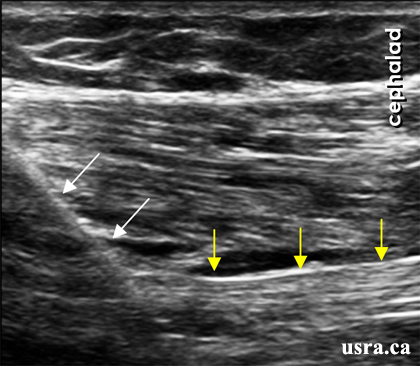
|
This figure illustrates the importance of transducer rotation. The transducer aligns the beam with the needle (white arrows) and the sciatic nerve (yellow arrows) in the popliteal region. Both the needle and the nerve are visualized in the long axis. |
Tilting [Link to top]
Tilting the transducer can improve image quality by aligning the ultrasound beam perpendicular to the target (nerve or needle). The figures
below demonstrate the importance of the angle of incidence and the effect of anisotropy (a change in nerve echogenicity with the angle of incidence).
1. The Impact of Transducer Angle on Nerve Imaging
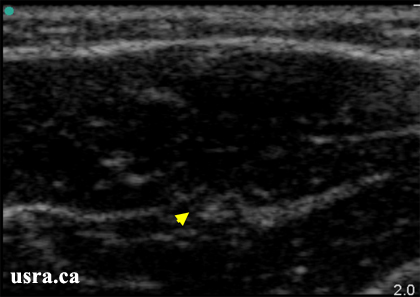
 The transducer is scanning at a 90 degree angle.
The nerve (transverse view) is clearly visible. Arrowhead = median nerve in the forearm |
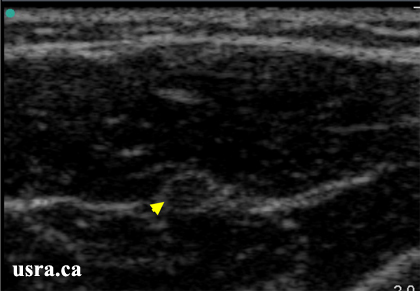 The transducer is scanning at a 75 degree angle.
The nerve is still visible but less clear. Arrowhead = median nerve in the forearm |
 The transducer is scanning at a 45 degree angle. The nerve is no longer visible. Solution: angle the transducer slowly until the nerve comes into view. Arrowhead = median nerve in the forearm |
|
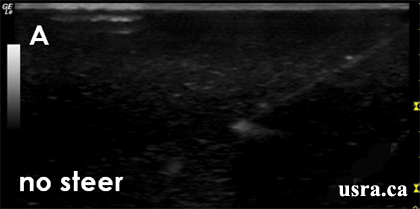
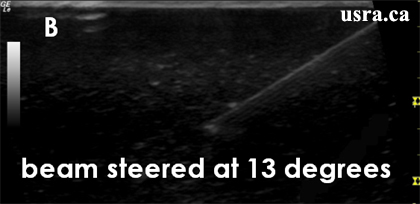
2. The Impact of Transducer /Beam Angle on Needle Imaging
|
|
The needle shaft is poorly visualized in figure A but becomes easily visualized when the beam angle is steered at a 13 degree angle in figure B.
Transducer Orientation
Transducer Orientation to Capture a Transverse View of the Brachial Plexus

|
1 = transducer in the axial oblique plane for the interscalene approach 2 = transducer in the coronal oblique for the supraclavicular approach 3 = transducer in the parasagittal plane for the infraclavicular approach 4 = transducer in the transverse plane for the axillary approach 5 = transducer in transverse plane for the midhumeral approach |
The aim is to keep the angle of incidence at approximately 90 degrees to the nerve to obtain the best possible visualization.
Checking The Transducer Orientation
|
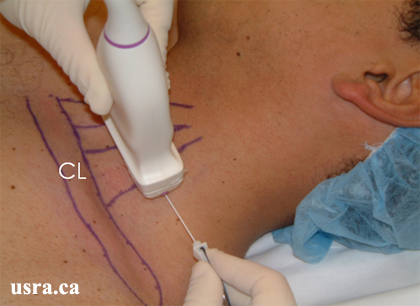
Transducer positioned on the left side of the neck 1. It is conventional to orient the transducer marker to the right side of the subject examined during a transverse scan and orient cephalad during a longitudinal scan. 2. Touching the transducer surface on one side of the transducer after gel application will immediately show transducer orientation. 3. Another simple maneuver is to move the transducer to one side (e.g., medially) of the body. The side of the screen one sees more anatomical structures is the medial side. |
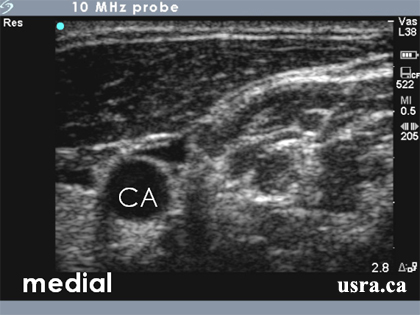 Expected interscalene image with vessels on the left side of the screen (i.e., medially) = Proper image orientation
|
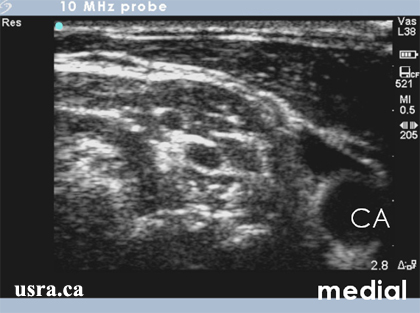 Picture of an inverted interscalene image with vessels on the right side of the screen.
Action: invert transducer to get proper orientation |