
 Arrow = hyperechoic area
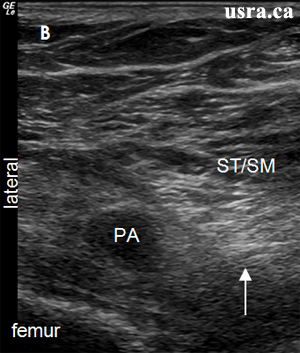
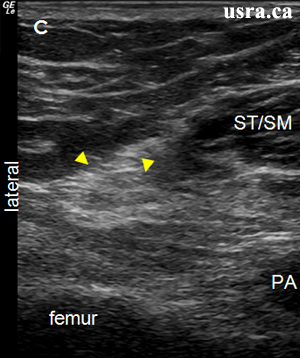 Arrowheads = sciatic nerve
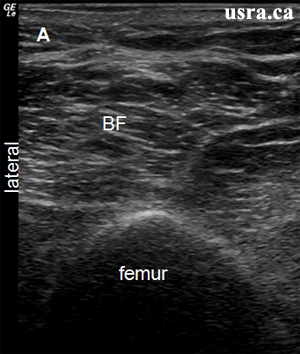
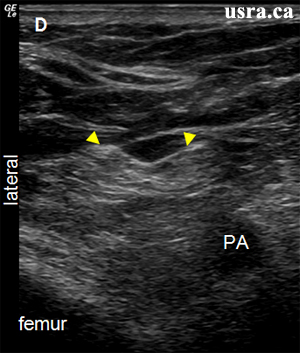 Arrowheads = sciatic nerve
 Needle Tip
Finding the needle tip during ultrasound guided nerve block can be technically challenging. This is particularly true with the out of plane needle insertion technique.
1. Transducer Movement to Locate the Needle Tip During Out of Plane Needle Insertion
|
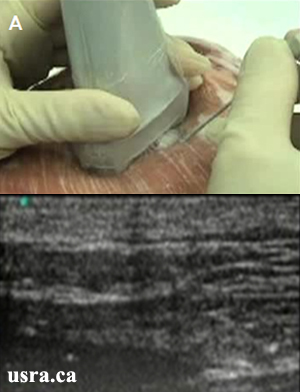
A. The needle is inserted out of plane with the transducer.
The needle image is not seen because:
|
|
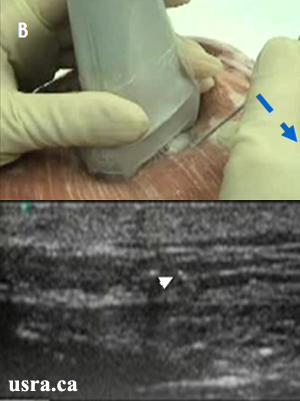
B. Maneuver # 1: Tilt the needle tip to a more superficial position by decreasing the angle of insertion (blue arrow, i.e., dropping the hand); this will bring the needle and the beam closer to a 90 degree angle of incidence. It is also useful to wiggle the needle tip from side to side or slightly in and out (a small jabbing movement) until the needle is seen (white arrowhead showing the needle shaft). |

|
C. Maneuver # 2: To find the needle tip, it is important to move the transducer towards the needle tip and then away from the needle tip. This scanning movement will determine whether the observed bright dot is the shaft or the tip of the needle. The needle tip is indicated by a white dot that is deepest in the tissue (white arrowhead). The dot will disappear once the transducer is no longer over the needle tip. |
2. Hydro Location Technique
It can be technically challenging to locate the needle tip when the needle is inserted at a steep angle (> 45 degrees) and when the target is > 4-5 cm deep.
Injection of a small amount of fluid (0.5-1 mL) through the needle will create an image of tissue expansion on ultrasound. This will indicate the location of the needle tip.
Dextrose 5% solution (a non conducting medium) is injected if electrical stimulation is desired for nerve confirmation. Alternatively, saline or local anesthetic (conducting medium)
can be injected if nerve stimulation is not required.
Demonstration of Hydro Location During Infraclavicular Block
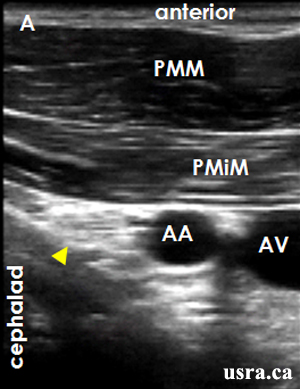 Figure A = pre-injection
Arrowhead = nerve AA and AV = axillary artery and vein PMM and PMiM = pectoralis major and minor muscles |
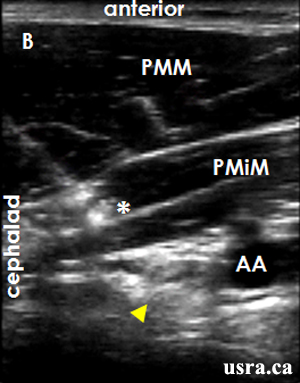 Figure B = needle tip is within PMiM as indicated by local tissue expansion (asterisk *)
Arrowhead = nerve AA and AV = axillary artery and vein PMM and PMiM = pectoralis major and minor muscles |
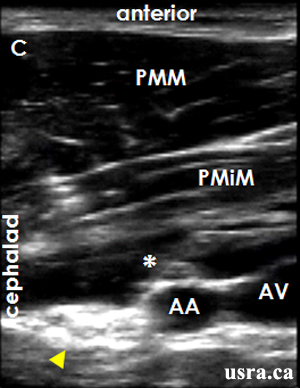 Figure C = needle tip is now deep to PMiM and anterior to AA as indicated by local fluid expansion (asterisk*) although the tip is not visualized
Arrowhead = nerve AA and AV = axillary artery and vein PMM and PMiM = pectoralis major and minor muscles |
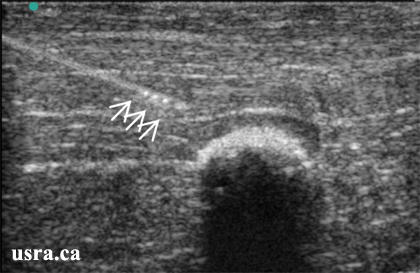
3. Echogenic Needle
|
It is easier to detect a needle with an echogenic tip. The figure shows an example of the echogenic tip needle (Hakko™ Medical Co. LTD Japan) with 3 hyperechoic dots at the needle tip (arrows). |